Using Modern Curves Templates
Roughly six months ago, a big dream of mine came true — I released a set of acrylic templates/rulers that work with my patterns! And then, per usual, I failed to share or talk about it, haha. But they say it's better late than never, so today, let me officially introduce you to and show you how to use the Modern Curves Templates!
The Design
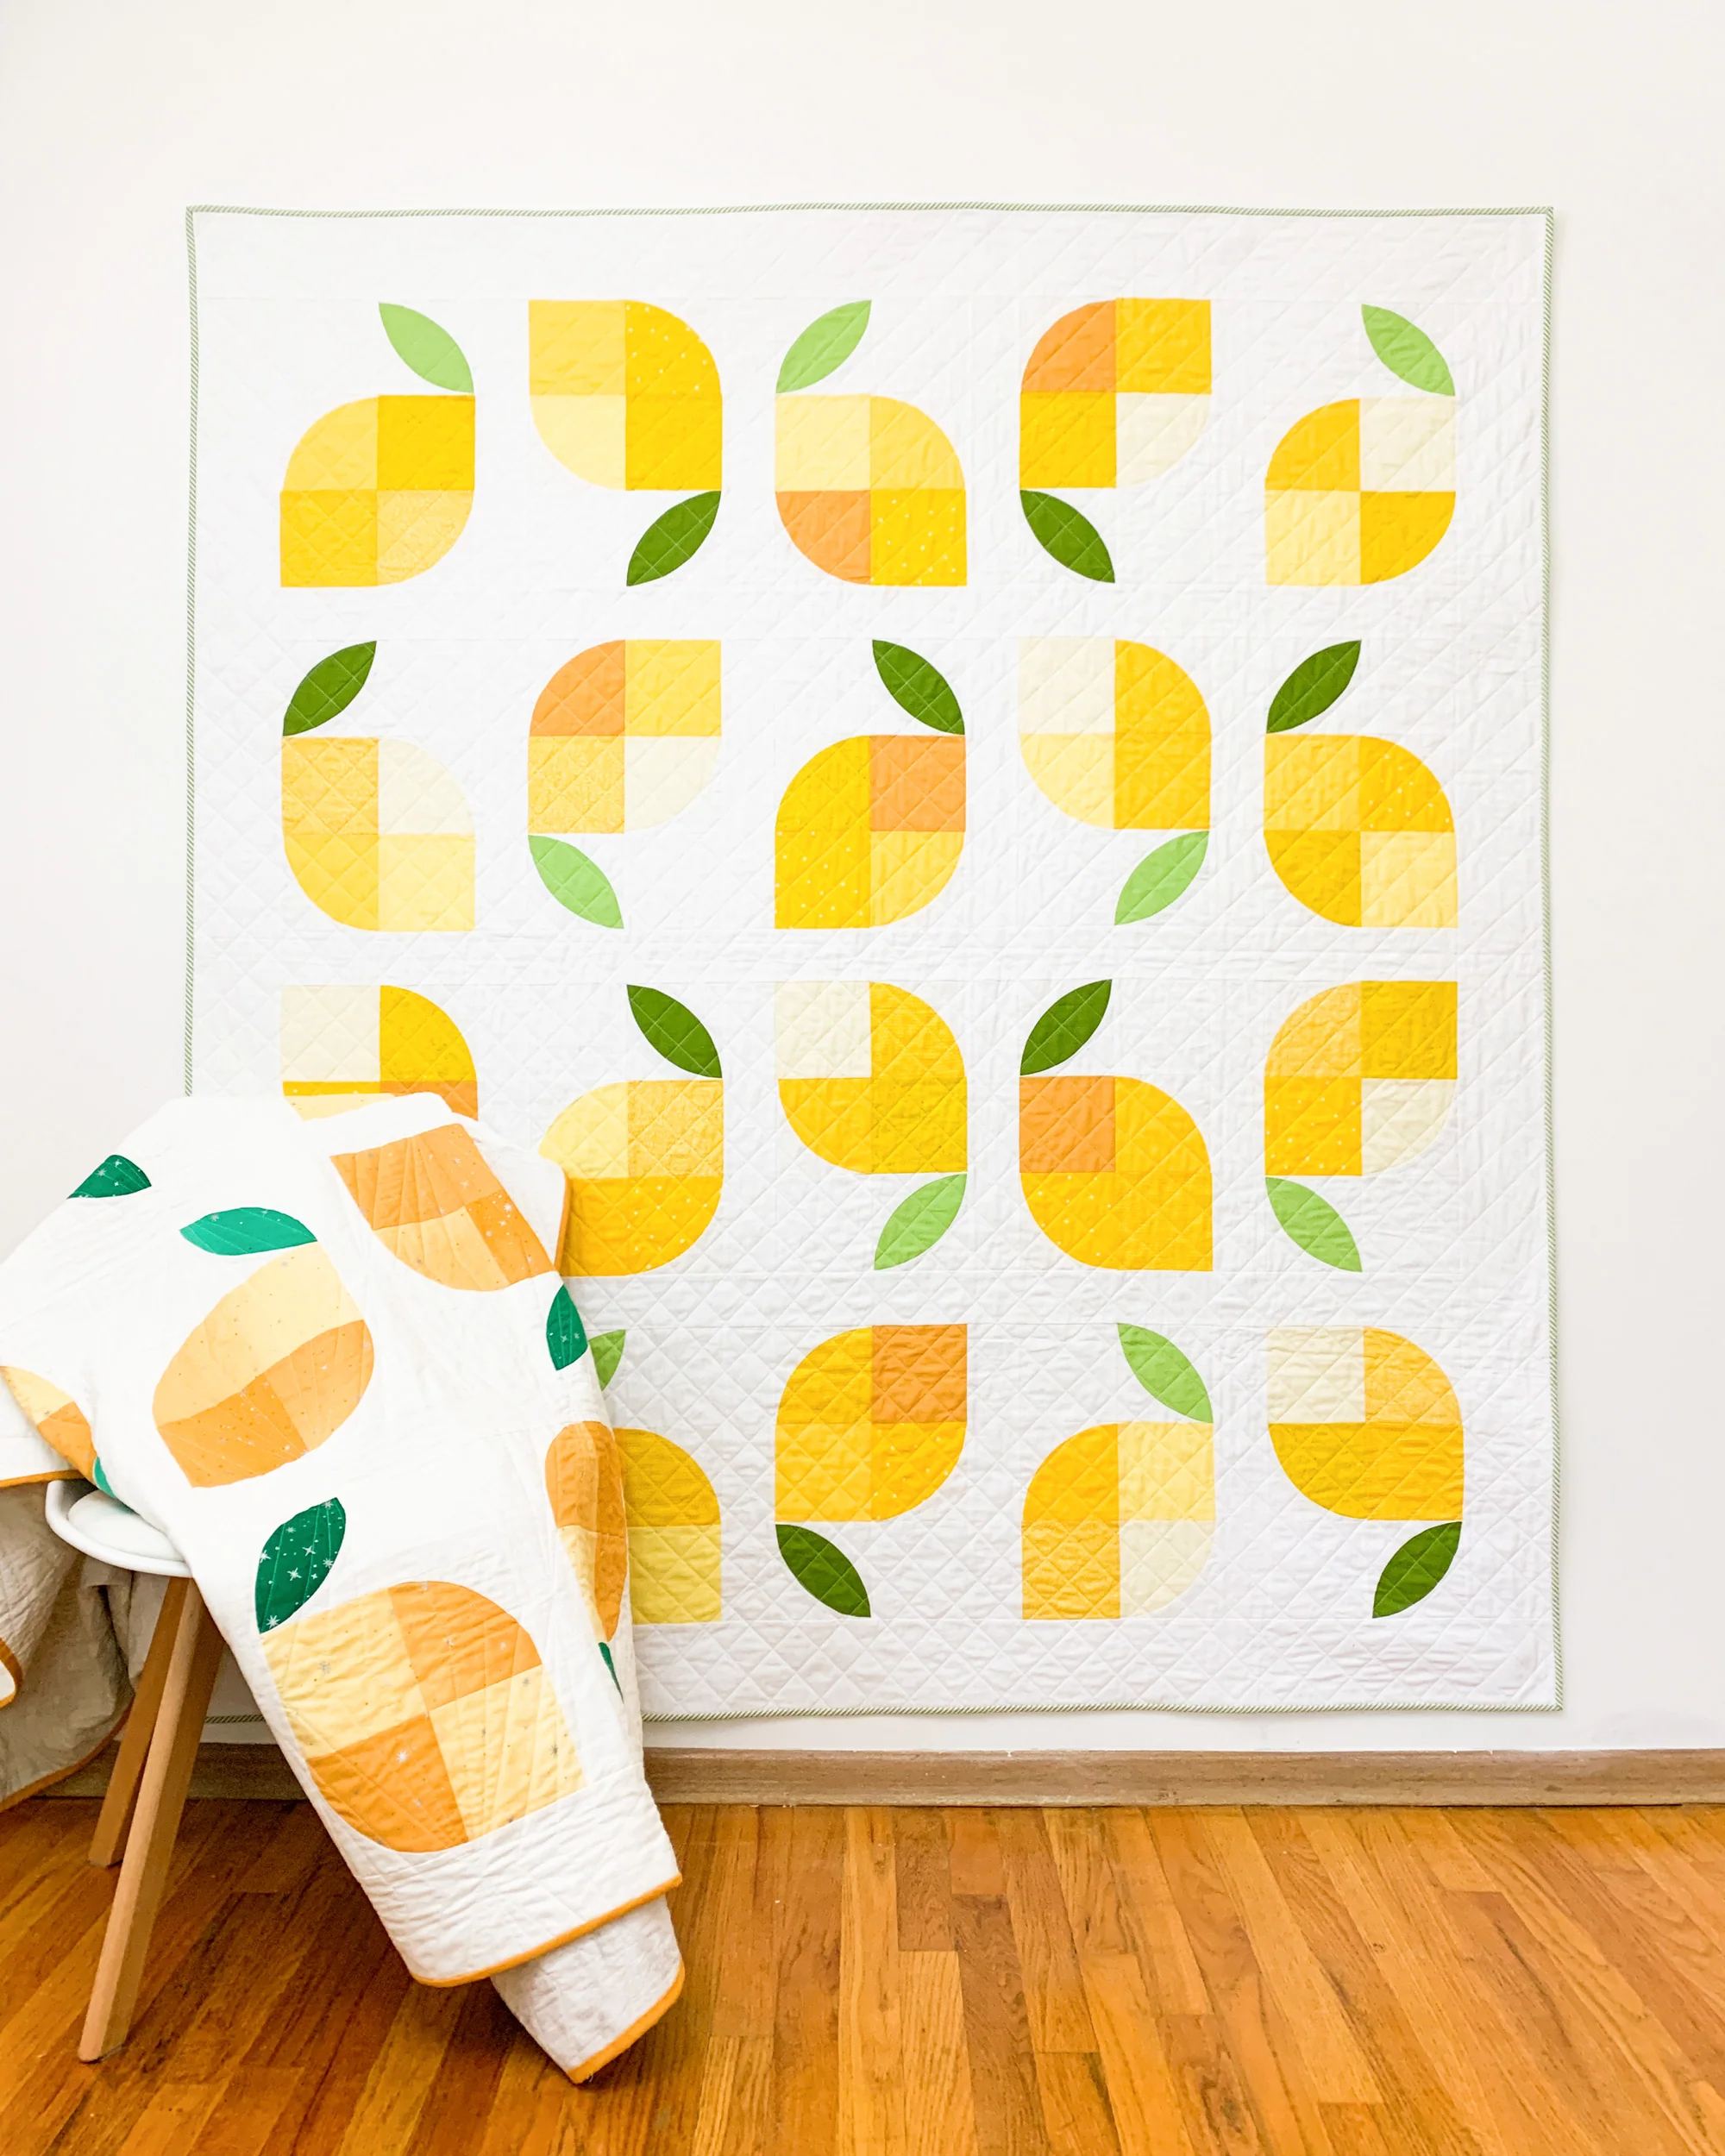
For years, Memi's Lemons has been one of my most popular quilt patterns. It's not hard to see why. It's pretty dang cute, if I do say so myself! And if you're willing to overcome the fear of sewing curves, it comes together pretty quickly, too. What's not quick? Cutting all those pesky curves! It's not hard by any means, but working with paper templates always slows down the cutting process.
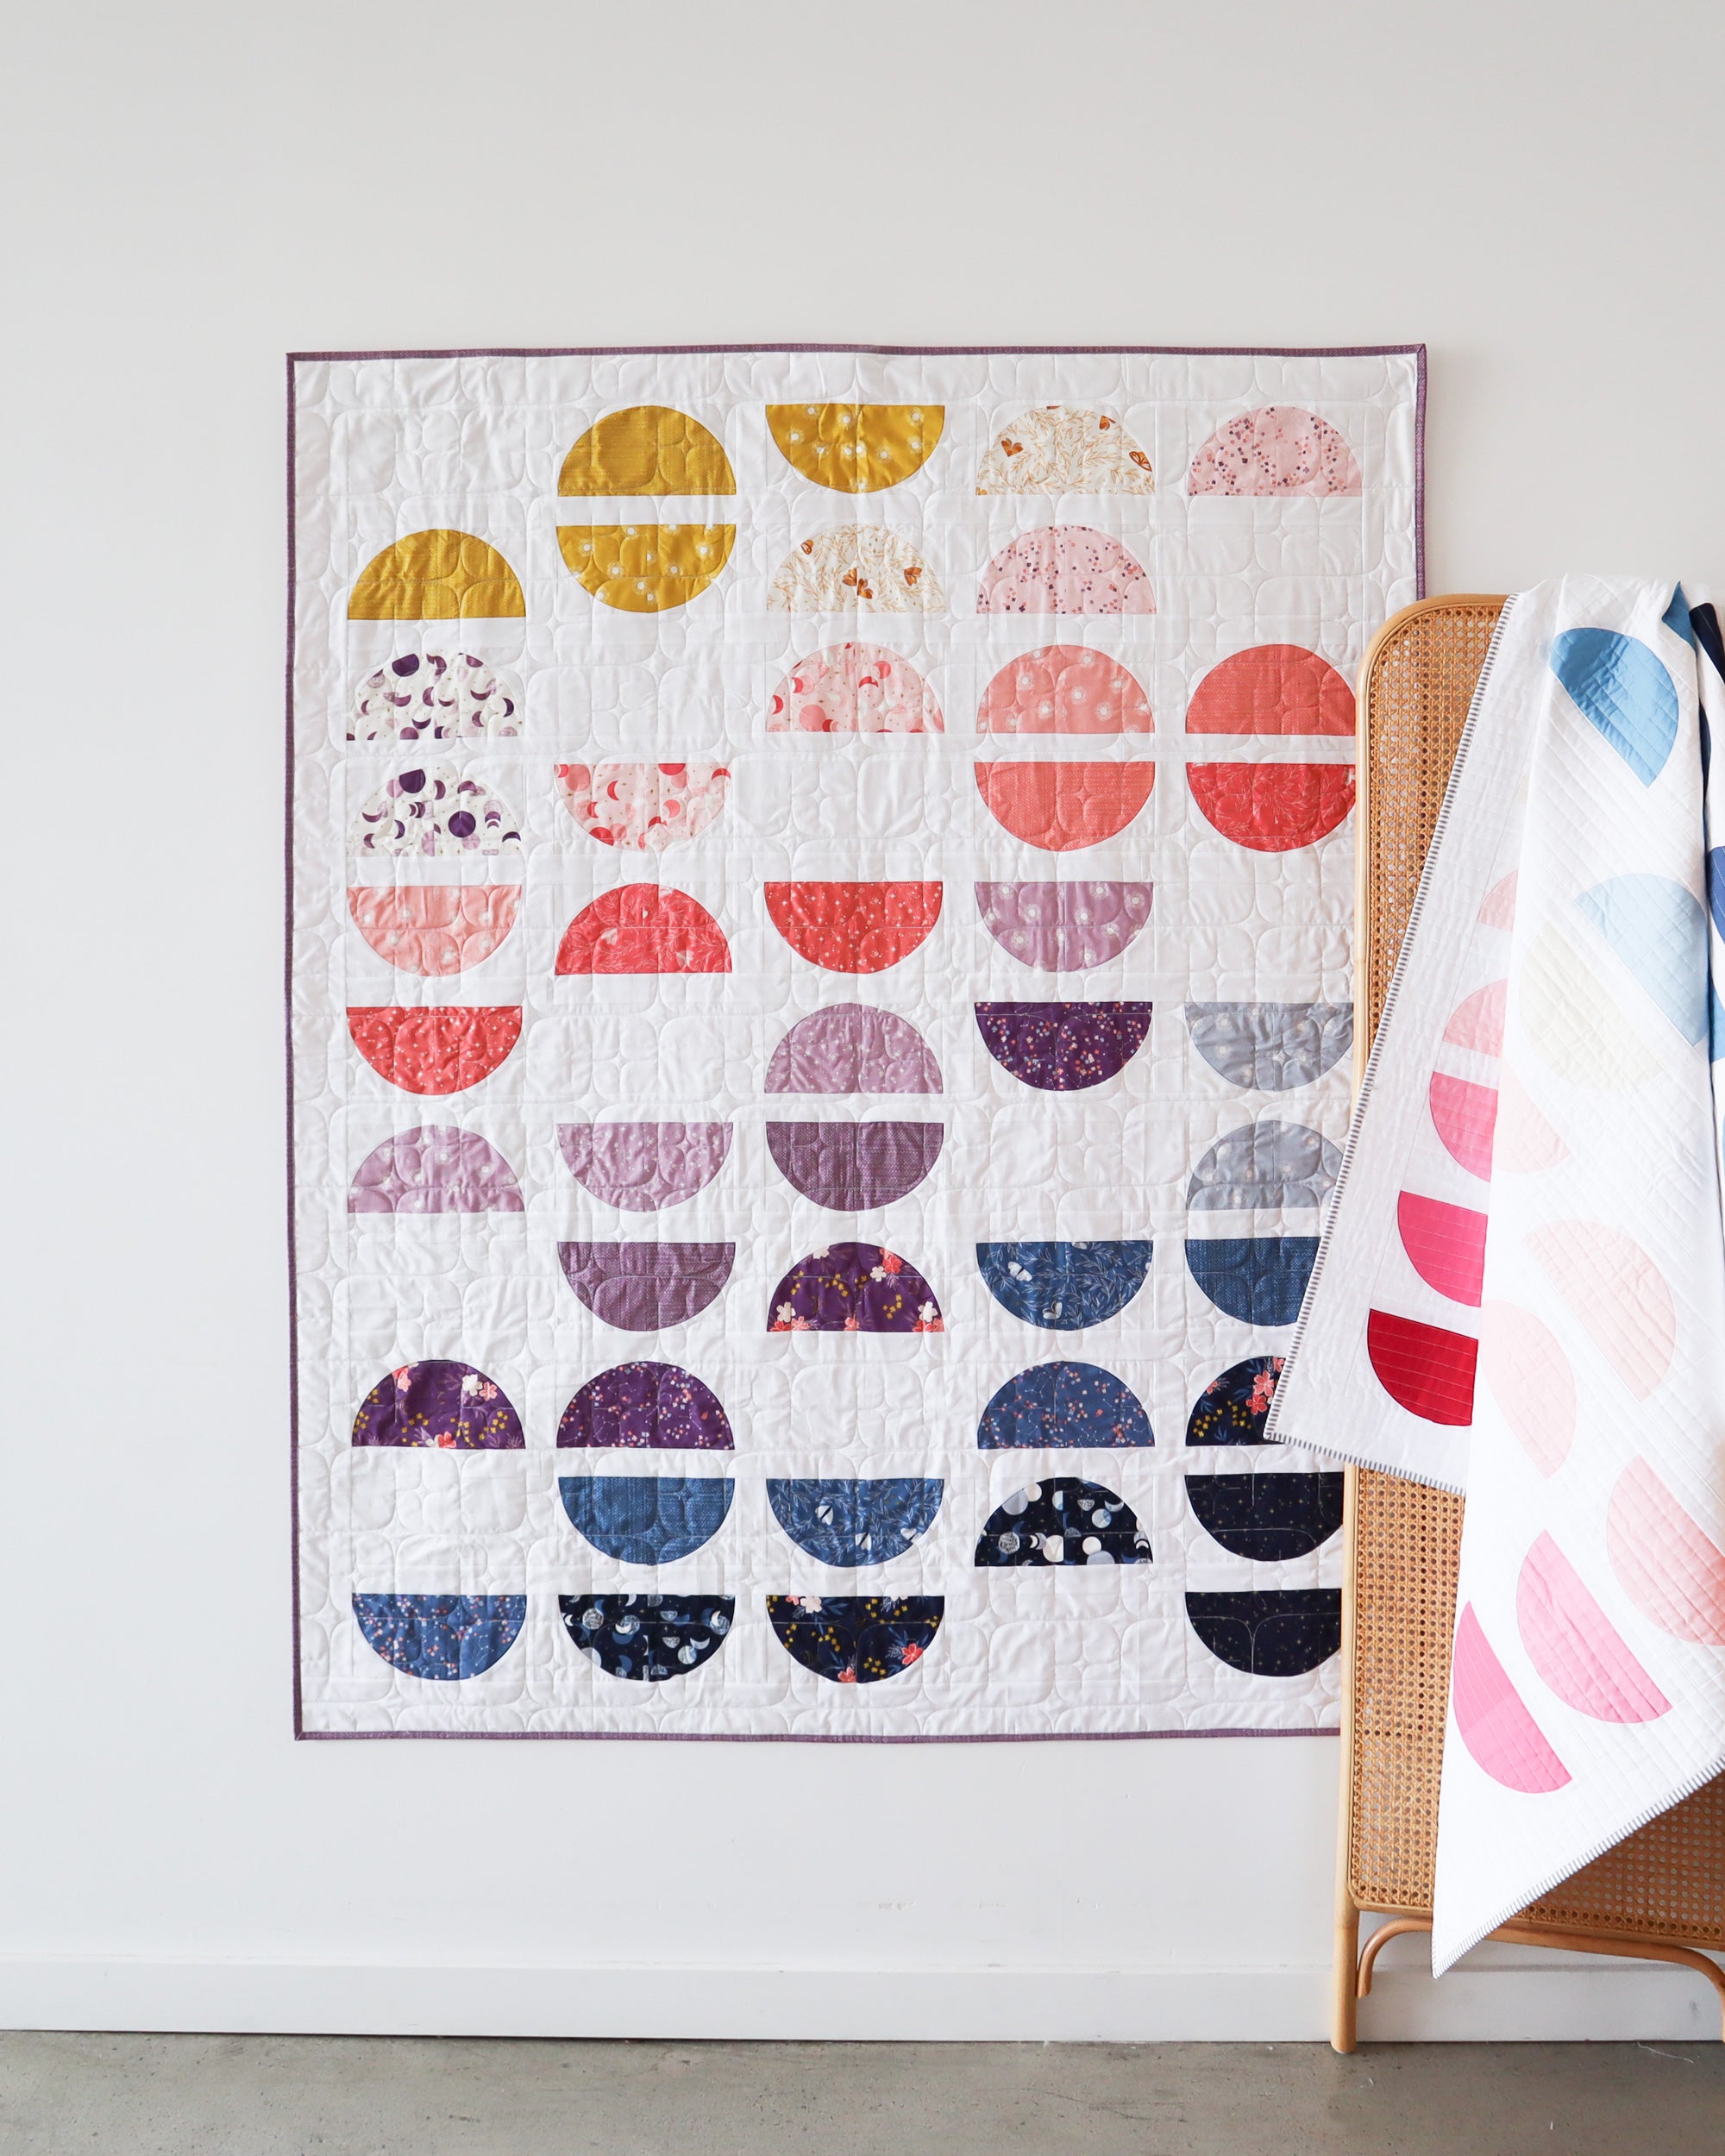
I've known this is a big reason people are hesitant to try the Memi's Lemons and Copihue patterns. So, when I was working on quilt patterns to accompany my Moonchild fabric collection and came up with Reverie, I knew people would have this hang-up again.
So, I reached out to the folks at Riley Blake Designs, knowing that my fabric design contract allowed for the possibility of notions design, and pitched them an acrylic template that would work with all three patterns – and they said yes!

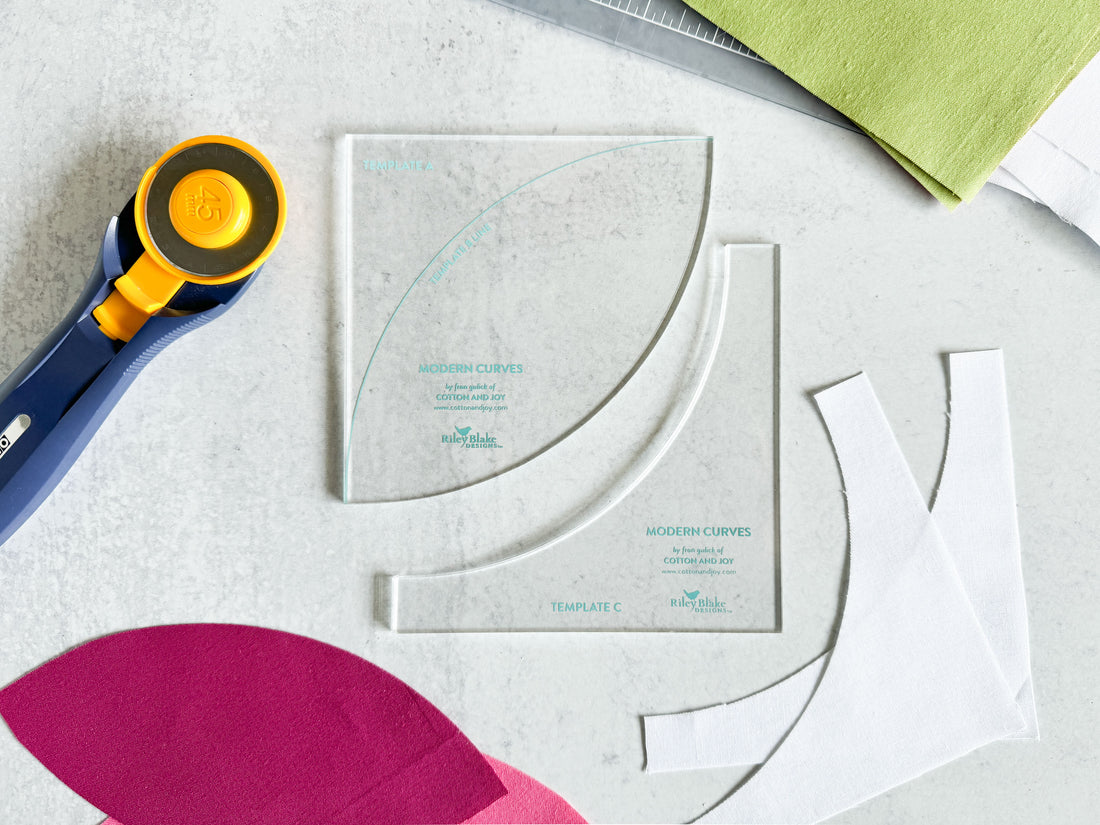
The Modern Curves Templates take the paper templates included in these three patterns and translate them into non-slip acrylic templates that make cutting curves quick and easy!
And since I hate the idea of buying a ruler or template for one pattern, I made sure that as soon as it was released, Modern Curves worked with not one, not two, but all three quilt patterns. And it's my goal to release patterns that will work with these templates continuously! Just this year, I released Crescent II and a free table runner pattern, Orange You Glad!
How To Use The Template
Now, let's talk about how to use these templates, with or without the patterns!
[if you prefer a video tutorial - click here or scroll all the way to the bottom!]
Cutting Template A
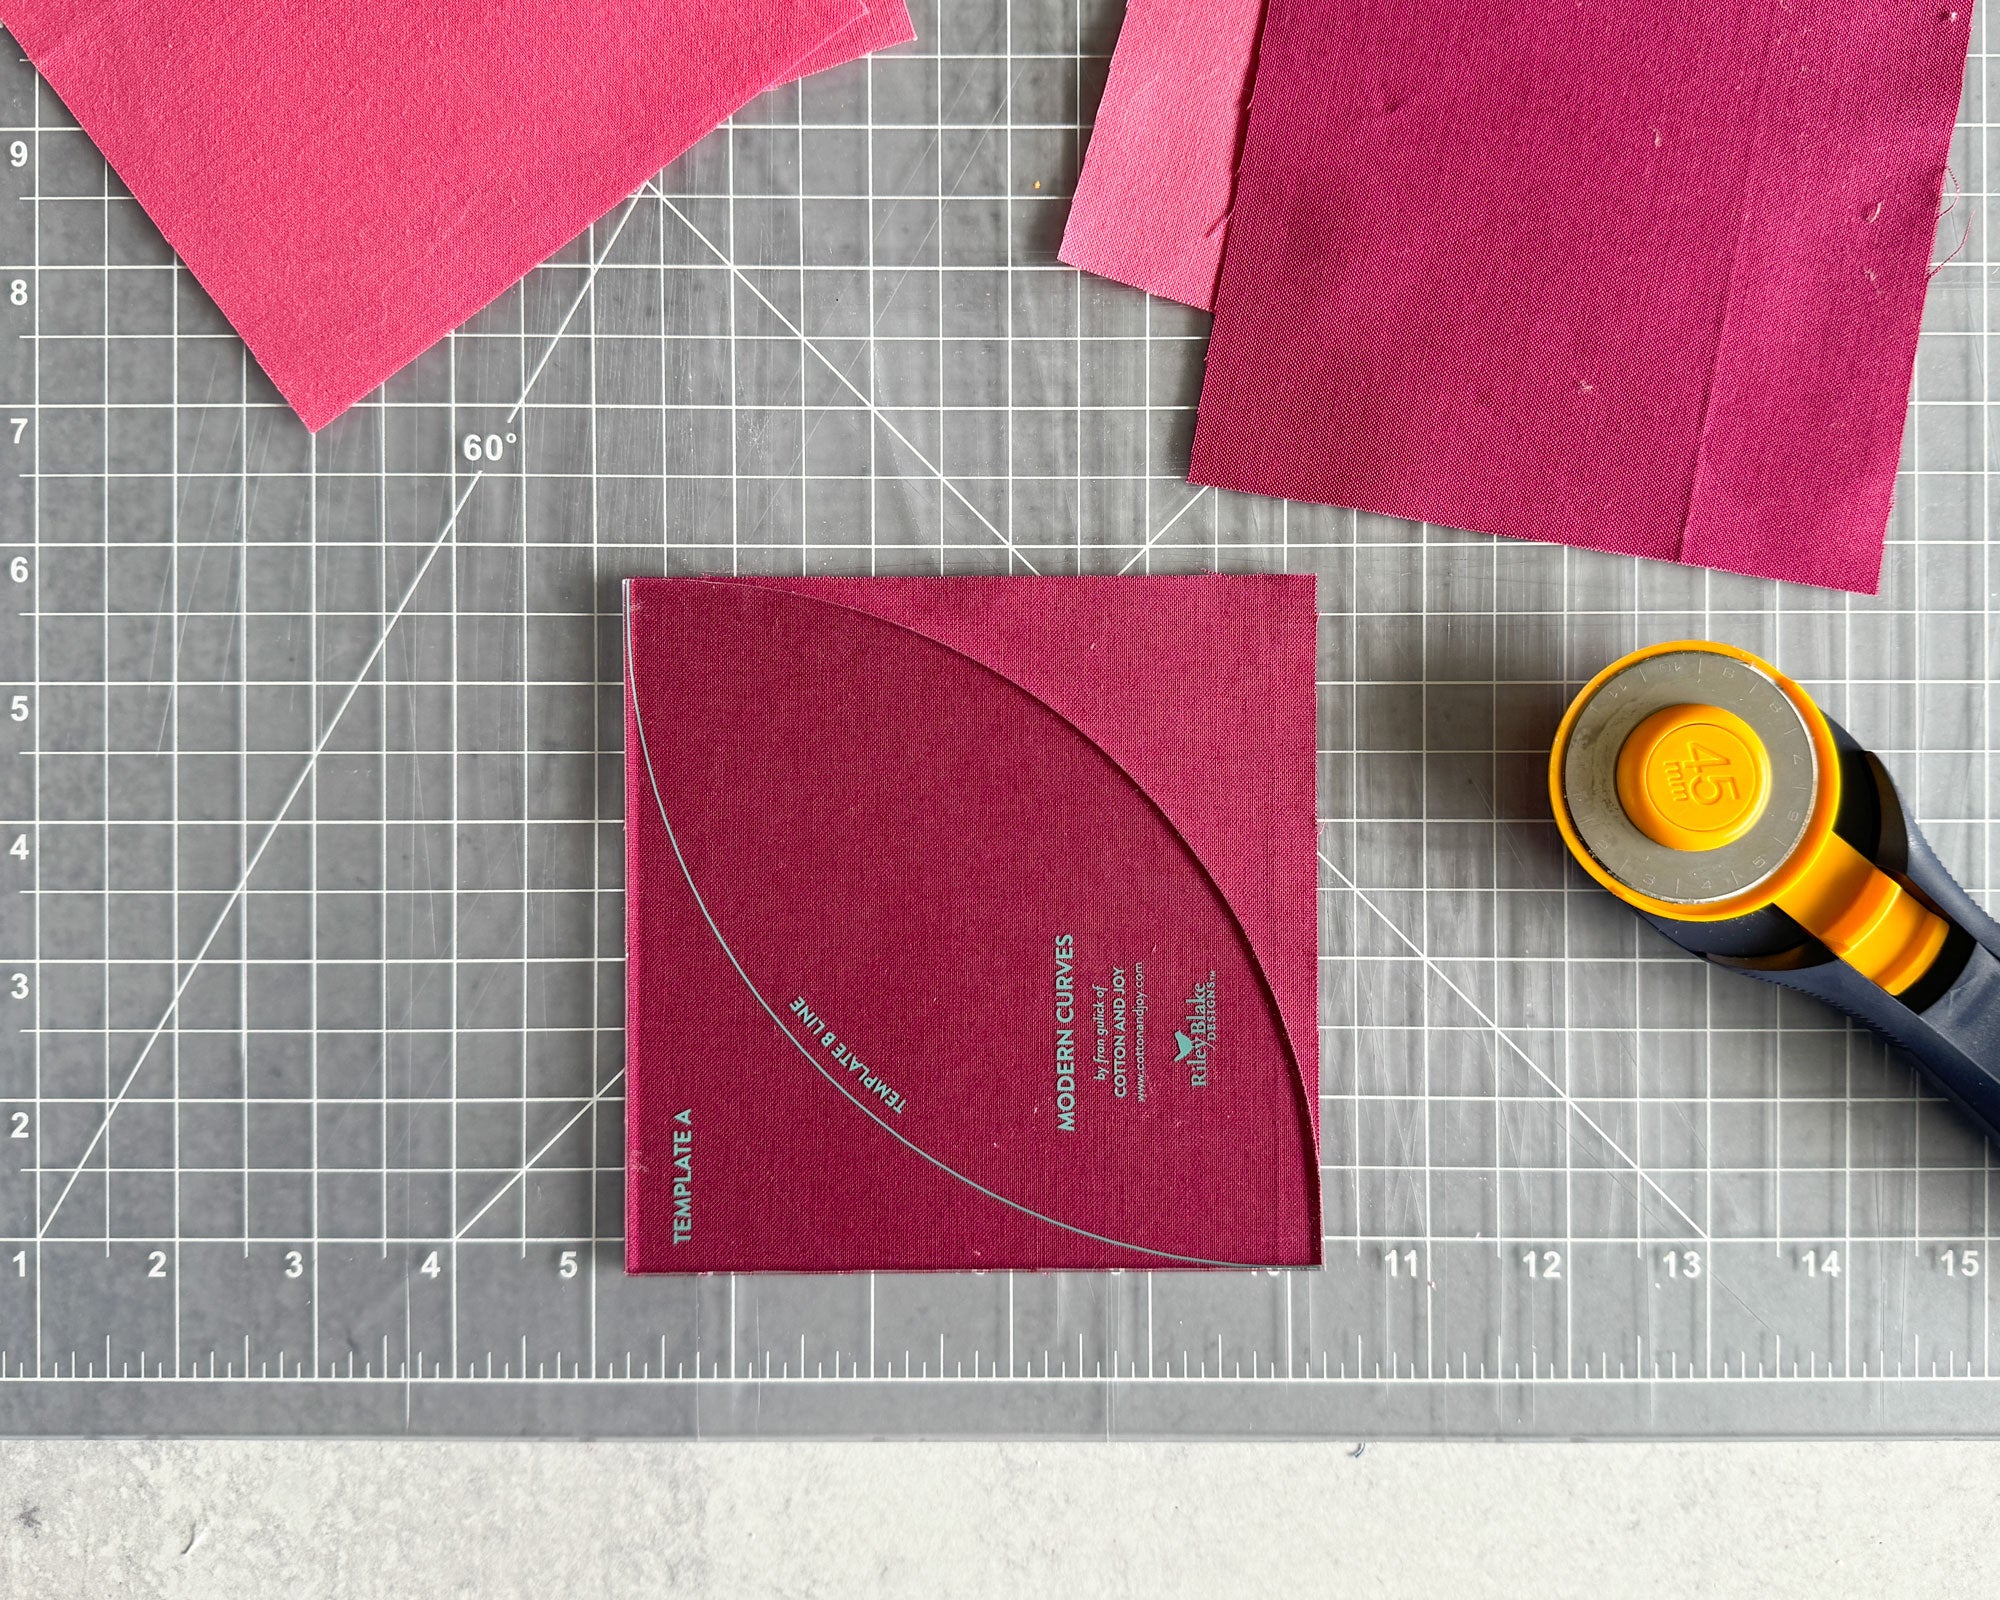
Let's start with Template A! This is the main shape – the shape where you'd usually use your prettiest fabric. I call this shape a quarter circle, but it's often called a drunkard's path or the convex shape.
To cut Template A, first cut 5" squares. Then, place the corner of the template on a corner of your fabric square. Then, using your rotary cutter, carefully cut around the template's curve.


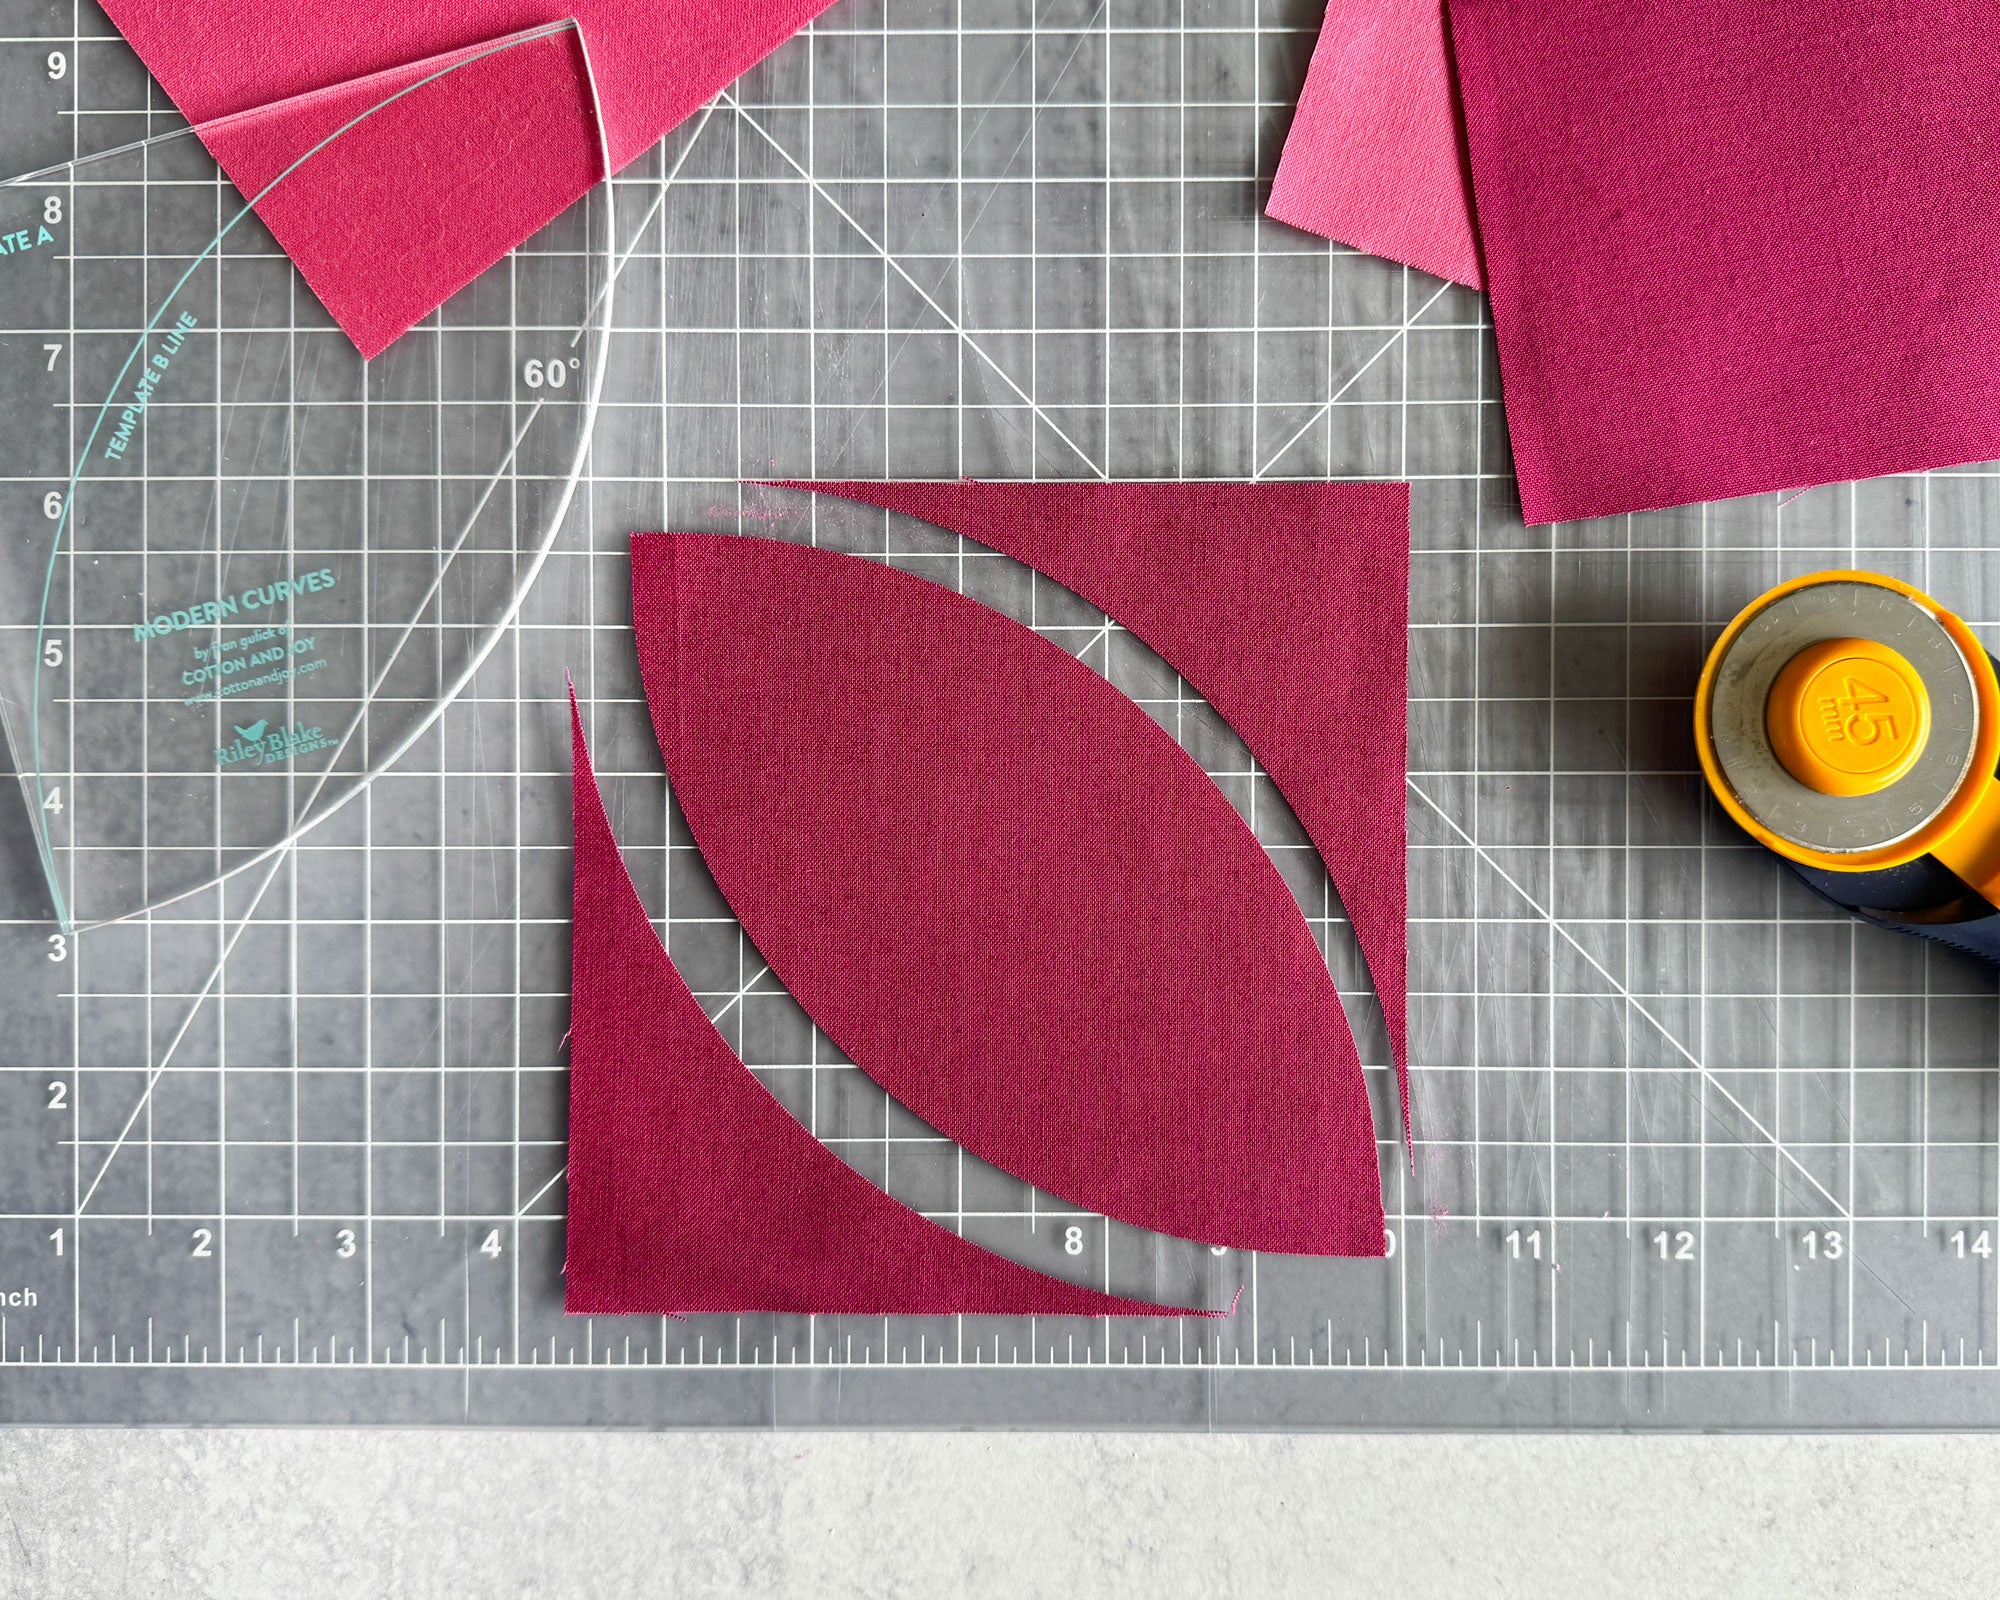
Cutting Template B
Template B is also a main shape – this shape is usually called an orange peel or leaf.
Cutting Template B is almost the same as cutting Template A. You start with a 5" square and then cut Template A, but instead of moving on to your next fabric piece, you rotate the fabric, line up the newly cut curve with the Template B line on the acrylic template, and cut along the template's curve again.
That said, you can squeeze a couple of more Template B pieces from your fabric if you're using a WOF strip or large rectangle, and then stagger your Template B cuts closet together, as shown in the diagram below.

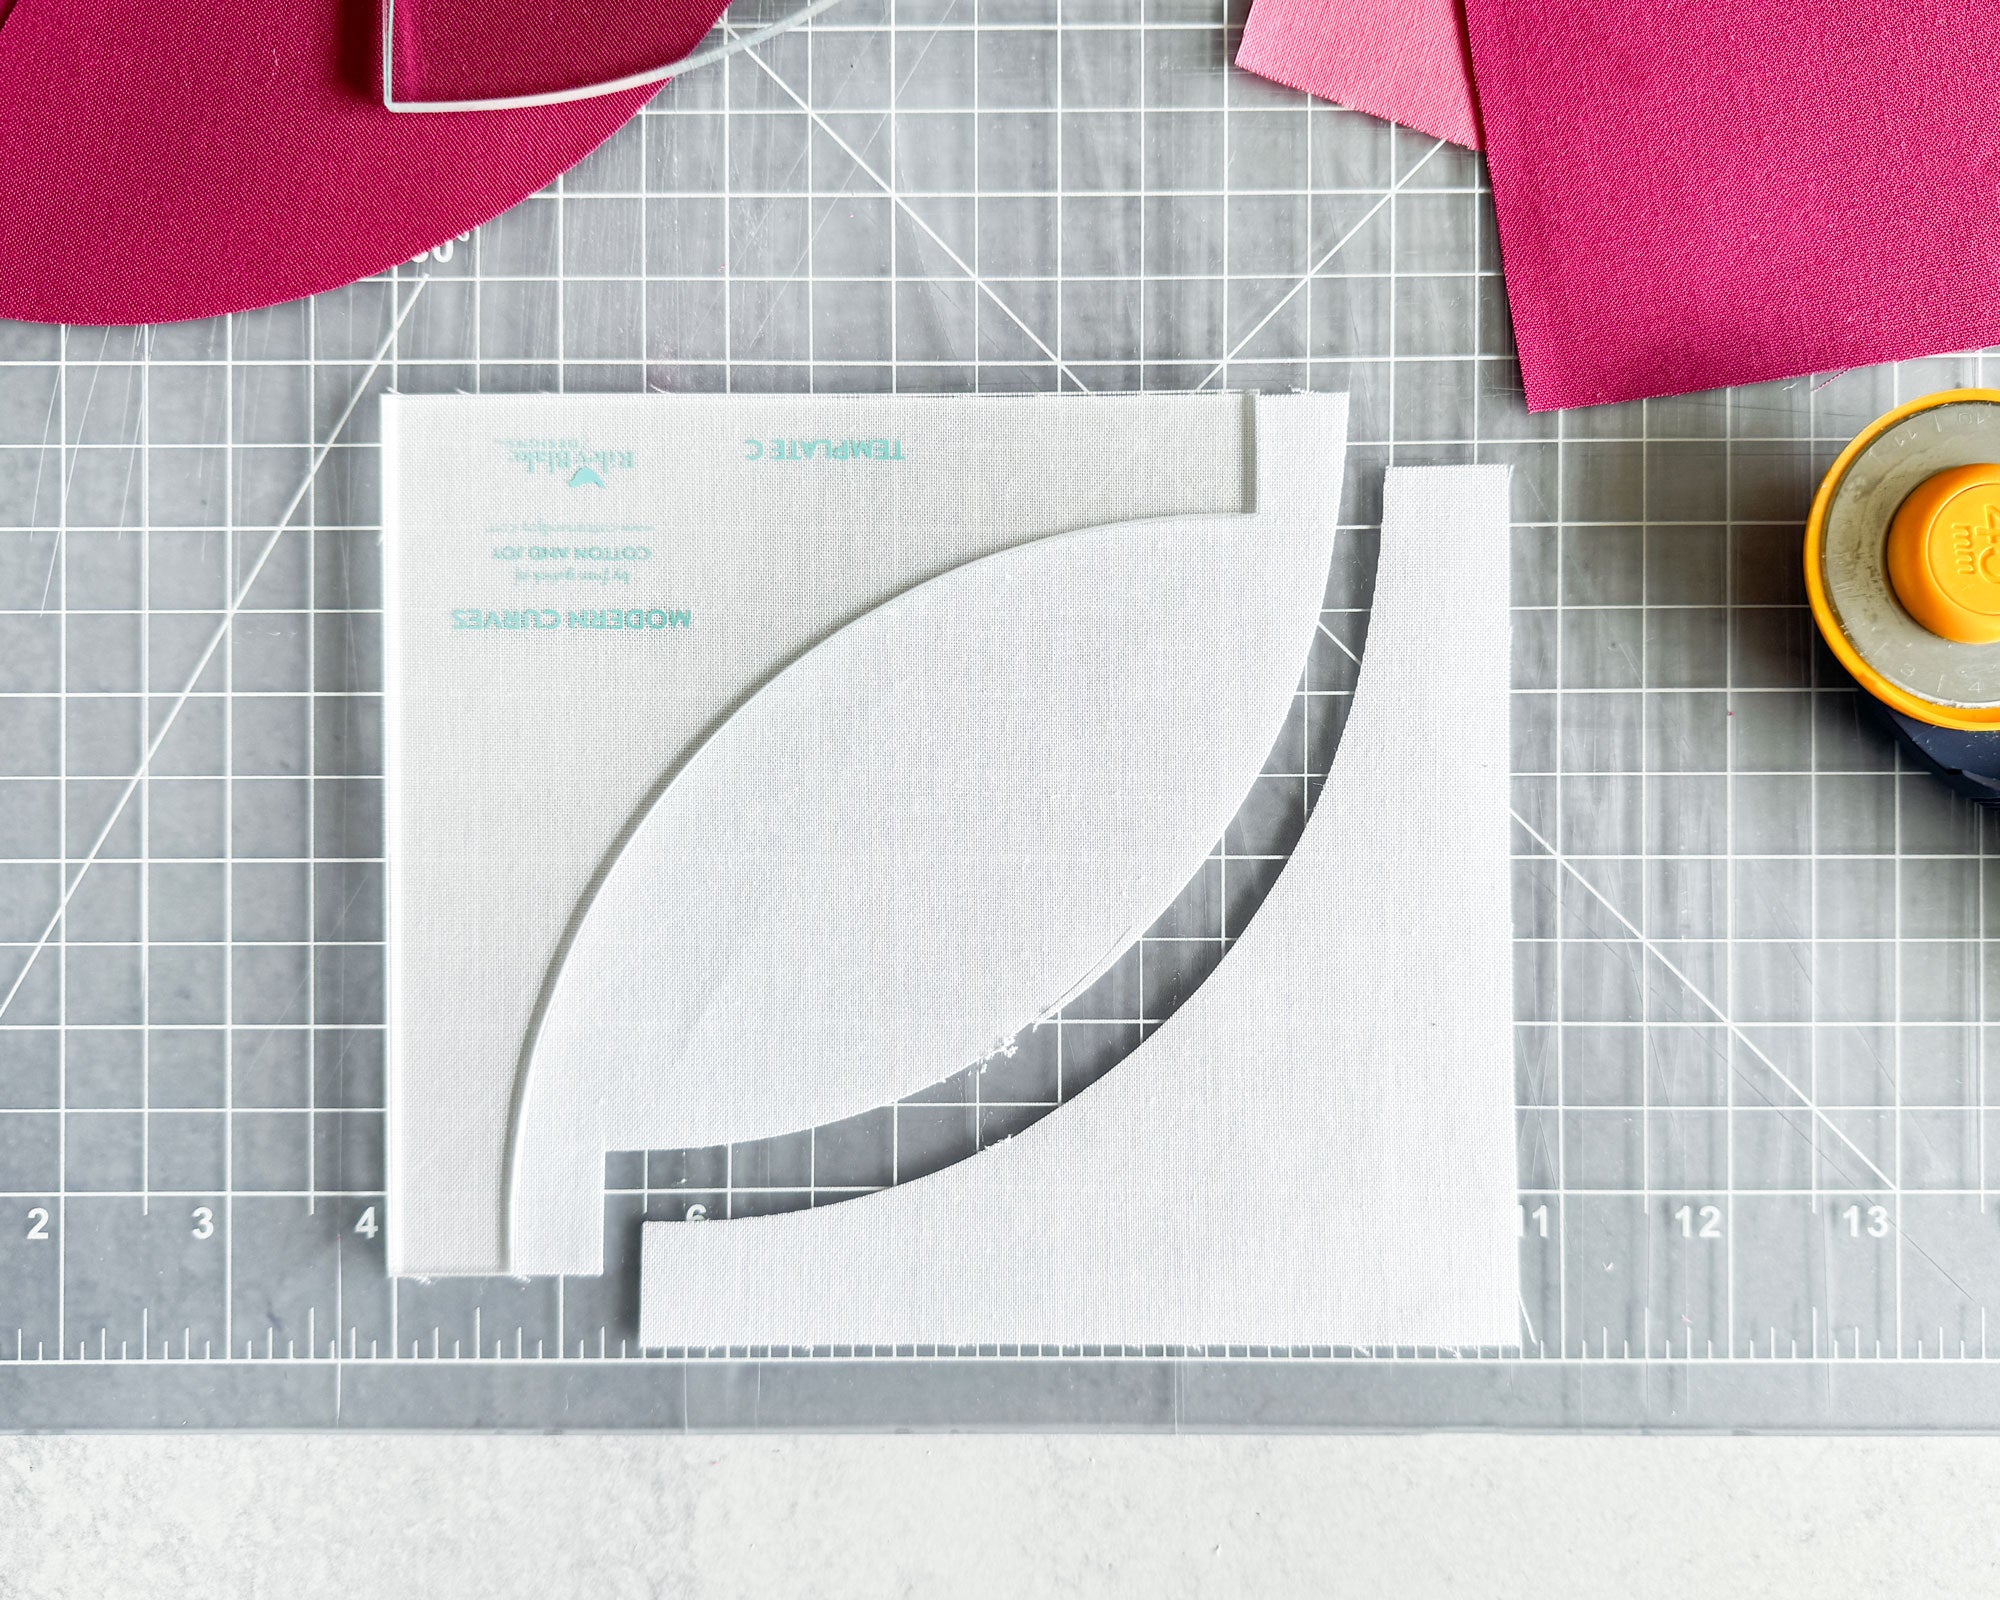
Cutting Template C
Template C is the arch, concave shape, or simply the background piece.
You can cut template C from a piece of fabric as small as 5.25" x 5.25". Just line up the Template's straight edges with the fabric's straight edges, and then cut the curve with your rotary cutter.
However, if you'd like to reduce waste, I recommend cutting Template C from a rectangle measuring 5.25" x 6.5" and staggering it as shown below. Each rectangle will give you two Template C pieces.

A quick note about Template C: This template is slightly oversized, so after you're done sewing Template C to Template A or B, you'll need to trim it down. I designed this template this way to allow for human error while sewing. We aren't perfect, and we are bound to make a mistake or have our fabric shift slightly while sewing the curve. Having to trim down your sewn units allows you to have perfectly sized units, even if your sewing wasn't exactly 100%.
And that's it! That's how you use these handy templates to cut your pieces! If you'd like some tips and a tutorial on sewing curves, head on over to my sewing curves tutorial!
Video Tutorial
I know a lot of people prefer text and pictures are good, but some prefer video so here's the video tutorial on how to use the Modern Curves templates!
Ready to try curves?
Now that you've seen just how easy it is to sew a quilt block with curves, you can jump right into a quilt pattern with curves! I have some quilt patterns you can try out and practice with below.